Data in Excel can be analyzed and visualized within the software but you might want to export the data to a database or query the data using SQL. You could be getting files that by themselves don't exceed Excel's row limit but when combined can't fit in one file. Sure, you could use an Excel trick to open large files but what if you have to do this every week? Then you'd still need a data pipeline with as much automation as possible.
Most tools recommend that you convert your Excel file to a csv and then export to a database. This is because .csv is a lot more common in data science and is not locked down to Microsoft products. So if the Excel file you have allows for it to be saved as a csv, we recommend you do.
It's very easy to convert a single worksheet Excel file to csv. You click File > Save As and choose csv from the dropdown list of options. However, if you try and save a multiple worksheet file, you get this:
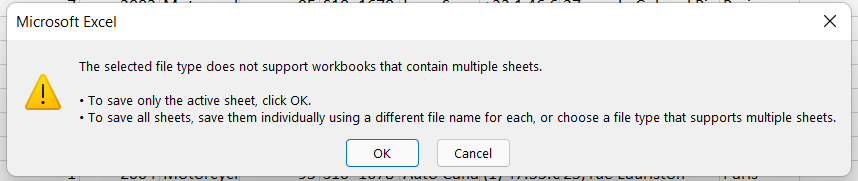
You could do what Excel says or write up a quick VBA script to save every worksheet in a file as a csv. Here's an article that outlines how to do that. Disclaimer: downloading and running VBA code from the internet might be hazardous. Do so at your own risk!
Once you have a csv file then you can follow this guide to convert it into a database or SQL. Why is this only 1/2 of an option? Because you can't save an Excel file as a csv all of the time! It may not fit in with the rest of your pipeline, perhaps you plan on adding to the same Excel file later on, or you don't want to have duplicate files with the same data.
In the above cases, use the other methods below.
SQLizer is an online tool that lets you create a MySQL (or a PostgreSQL, SQL Server) script given an Excel file less than 5000 rows. The tool outputs a SQL file with a table definition (using CREATE ... syntax) and as many INSERT statements as there are rows in the Excel file. Here's how to use it:
1. Head to https://sqlizer.io/#/ , click on Select your file..., and navigate to the file you want to upload.

2. Choose MySQL from the database type, along with verifying all of the checkbox options.
3. Change the Database Table Name if you want and click on the Convert My File button and wait while it processes.
4. After it's done, you should see something like this:
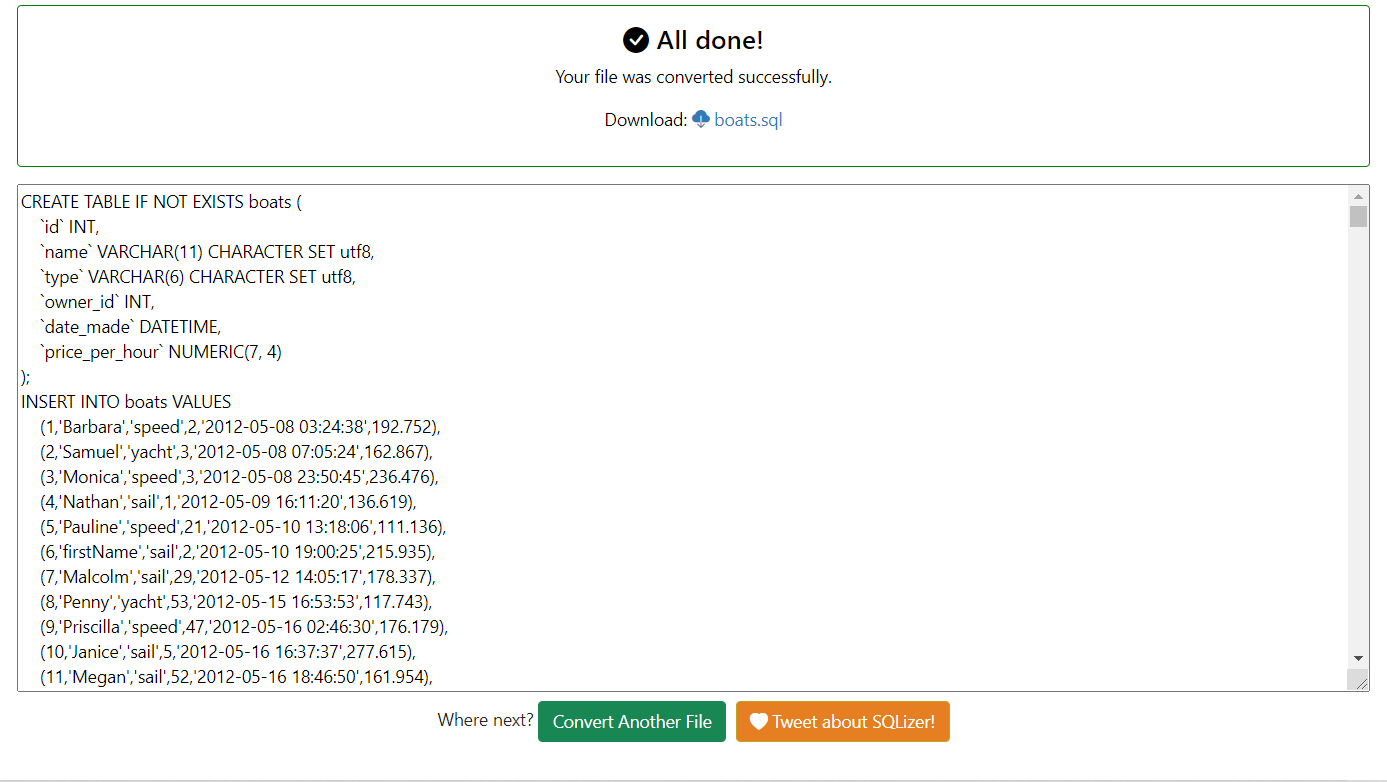
5. You can then download the file and import it from within MySQL Workbench using File > Open SQL Script and selecting the created SQL script.
And that's it! SQLizer does have a 5000 row limit in its free version but offers paid plans with API access to integrate with data pipelines. SQLizer is recommended if you either don't need automation or if you're comfortable with working with APIs for automating your data pipeline.
Dropbase lets you import an Excel file, apply some data cleaning steps, and load it to a database extremely fast. You never have to clean the same data twice because Dropbase saves your processing steps as a pipeline to be used in future files of the same schema.
Log in to your Dropbase account. To create your first new workspace, click on the workspace's dropdown menu in the top left and then select Create New workspace.
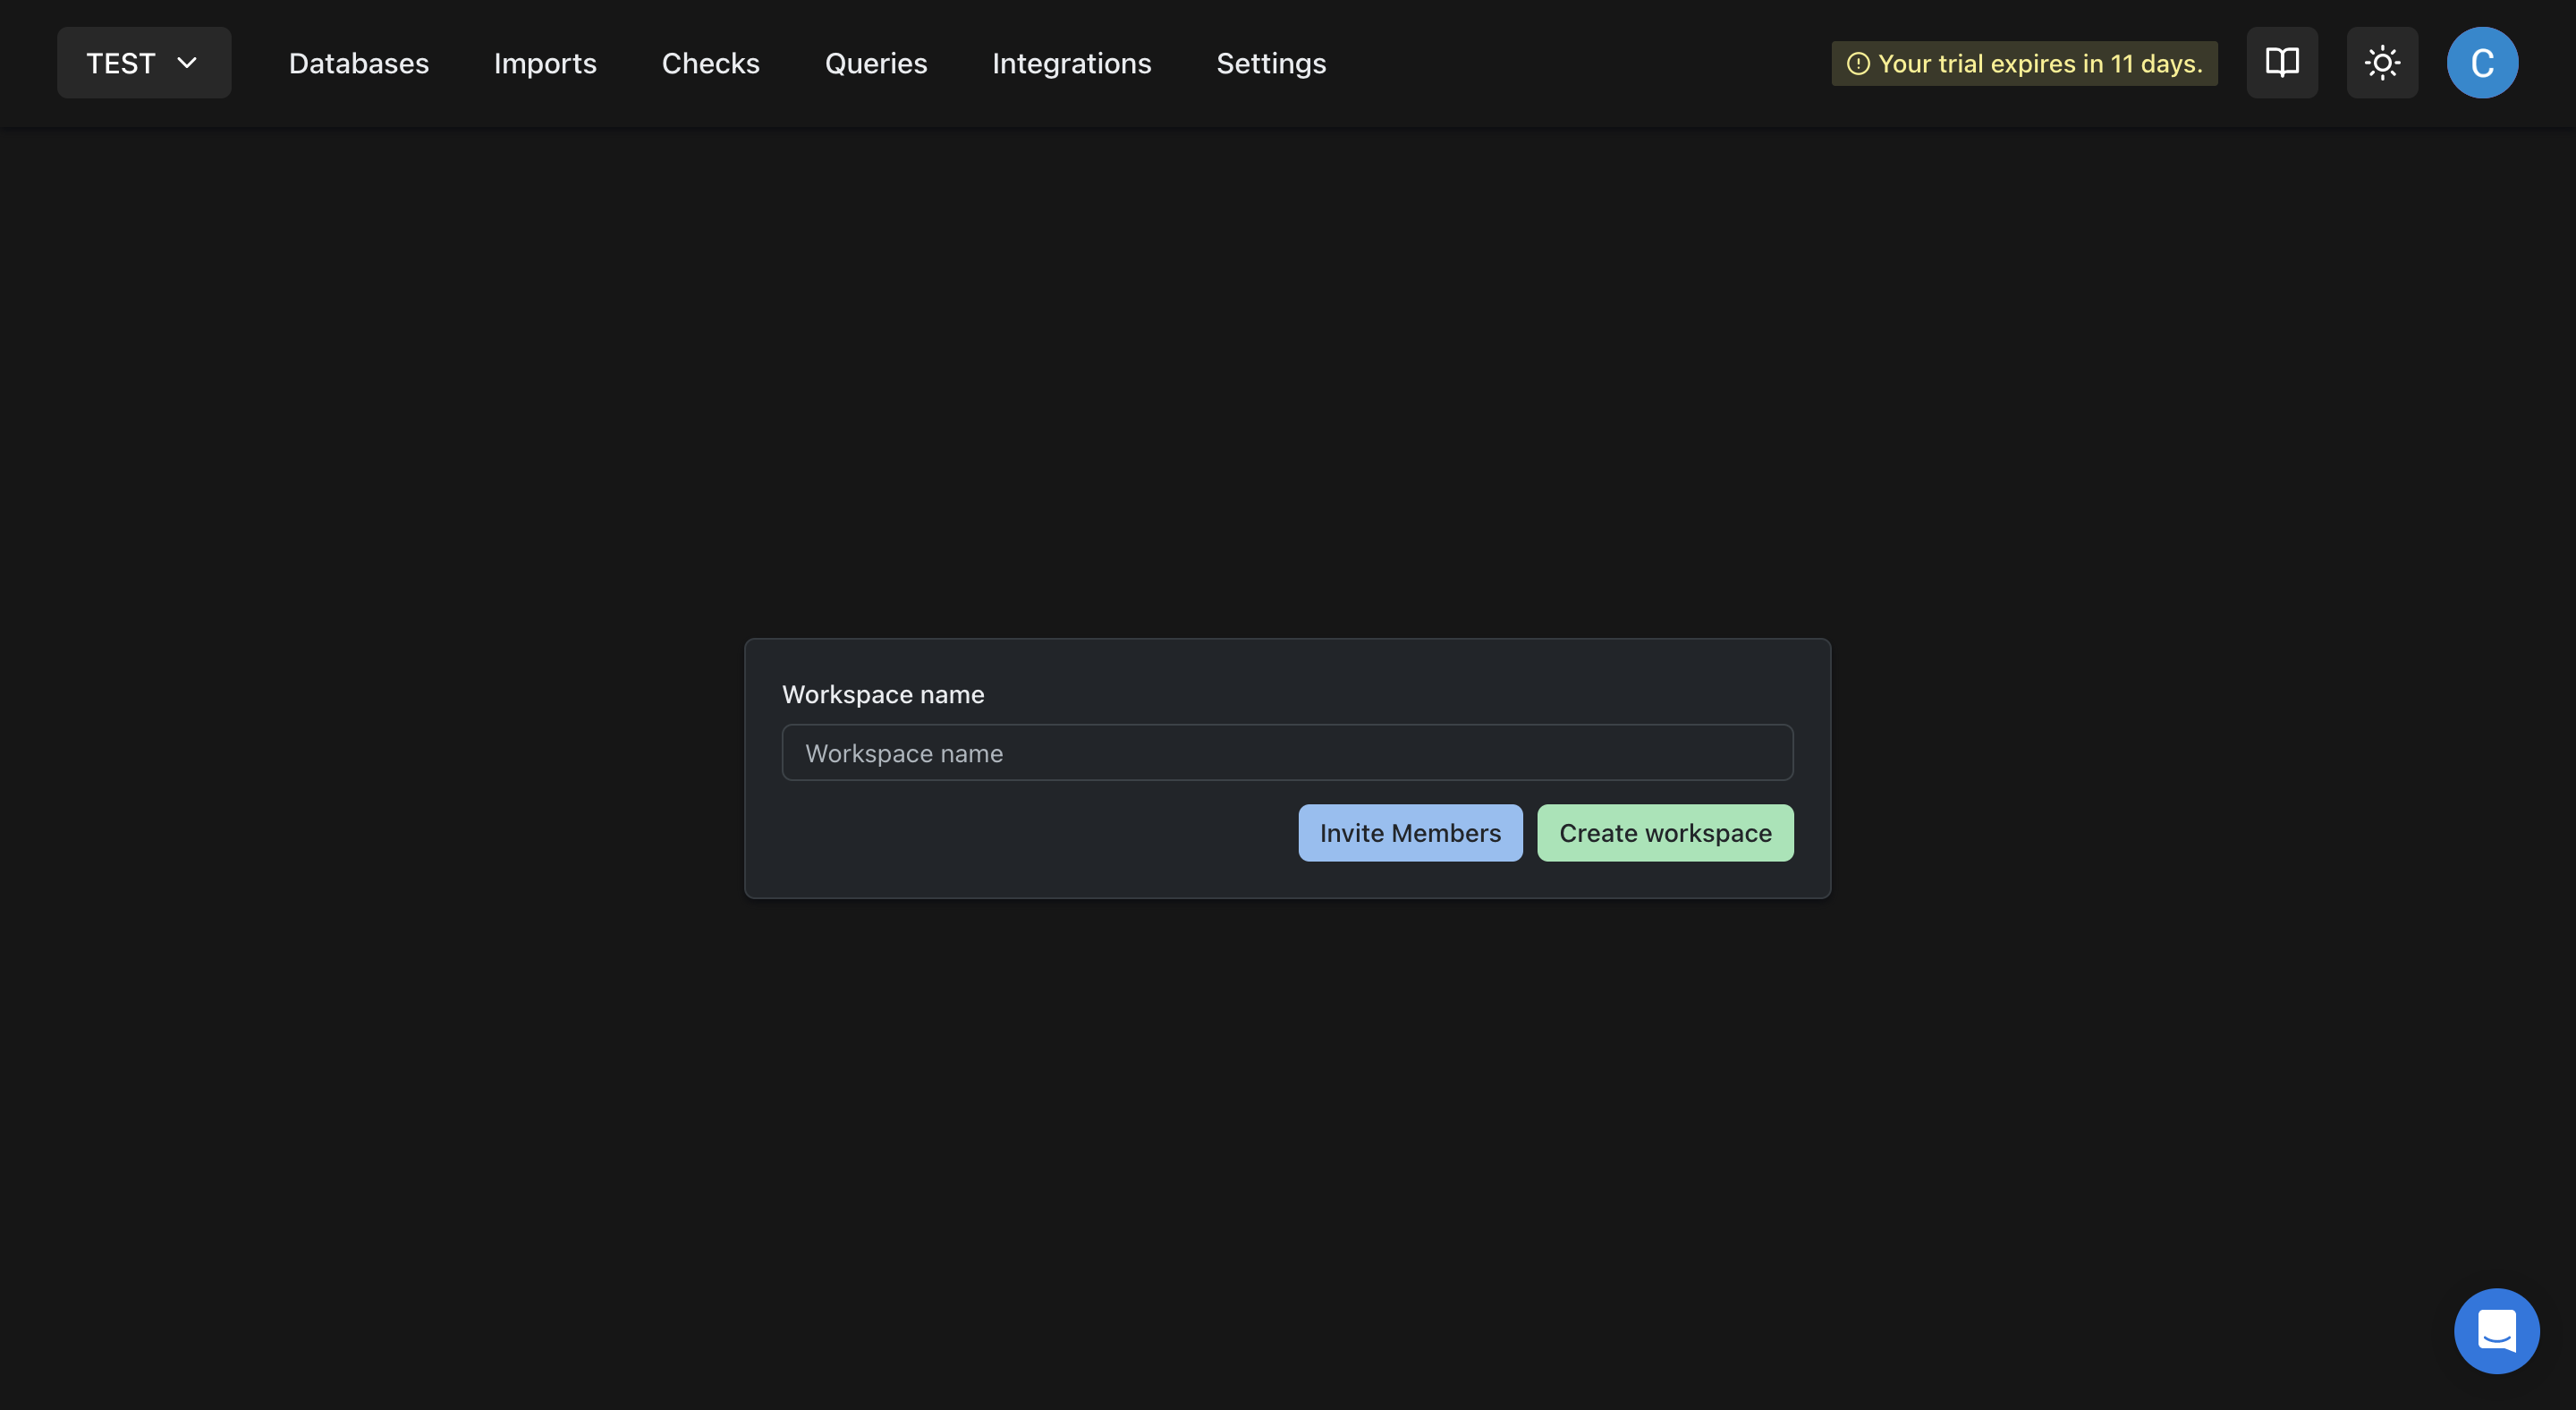
Then click on Create New Workbook in the new workspace. This will create a new workbook where you can import your Excel file.
After clicking on your new workbook, you will see this screen if you create a new table:
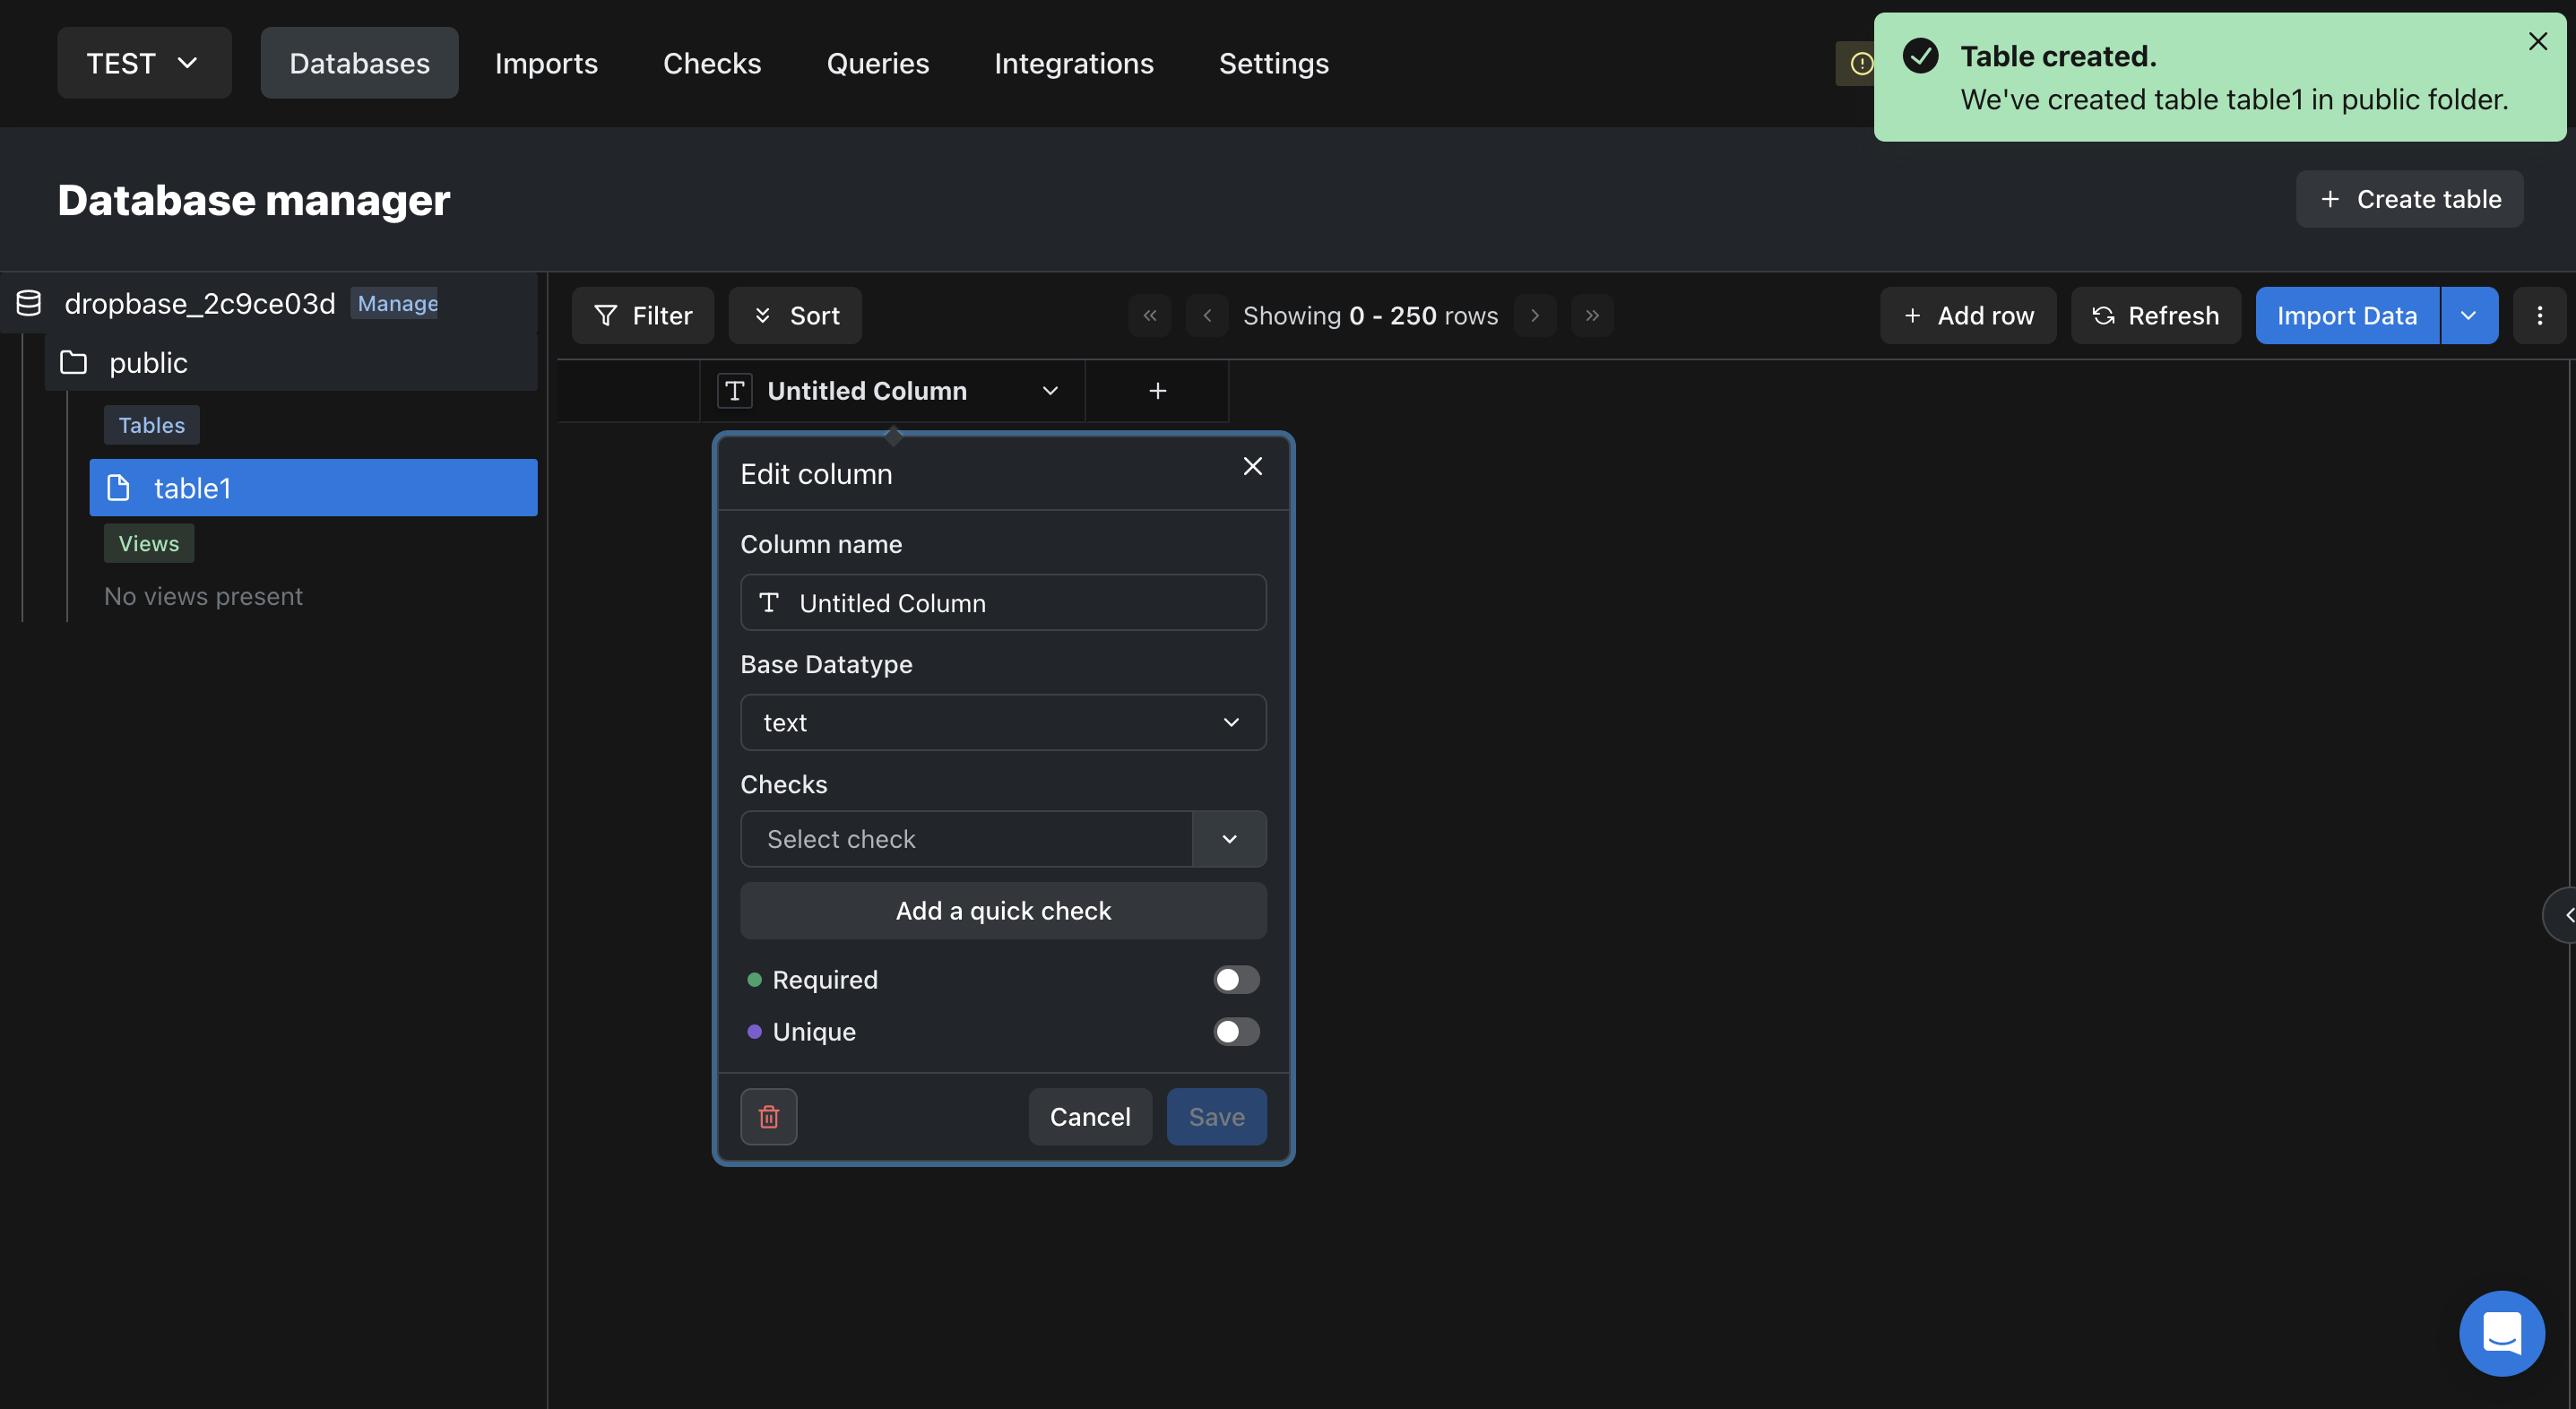
Click on Import Data in the right sidebar which will open up an Import file window. Drop your Excel file there and click Upload File. In addition to flat files like Excel and csv, Dropbase also allows importing data sources from a URL or web app, as well as other Dropbase databases.
You can now apply some pre-built processing steps to your file such as deleting a column, renaming, and column mapping. Dropbase also allows you to create a custom validation checks to clean your data prior to loading it to the database. Follow through with each processing step along the pipeline to export your data into the database.
Finally, once your data has been thoroughly reviewed and cleaned, click on Load to Database. You're done! If you now navigate to Workspace settings, you'll see the access credentials to connect the database with a BI tool of your choice.
Dropbase works best if you are going to be working routinely with Excel files and want to automate the cleaning steps. However, if all you want is to export an Excel file as is to an existing database, then check out the next option.
If you have a SQL Server as your relational database management system, there are two main ways to export an Excel file to SQL Server. The first way assumes you can convert it to a text file, so we will avoid that. The second way lets you keep your Excel file as is. We'll be using SQL Server's Import and Export Wizard to help, but there are other ways if you're comfortable with some amount of coding.
1. Open up SQL Server Management Studio (SSMS) and connect to a Database Engine. Note: if you're just trying out SSMS, be sure to download a SQL Server edition and then use "localhost" under server name.
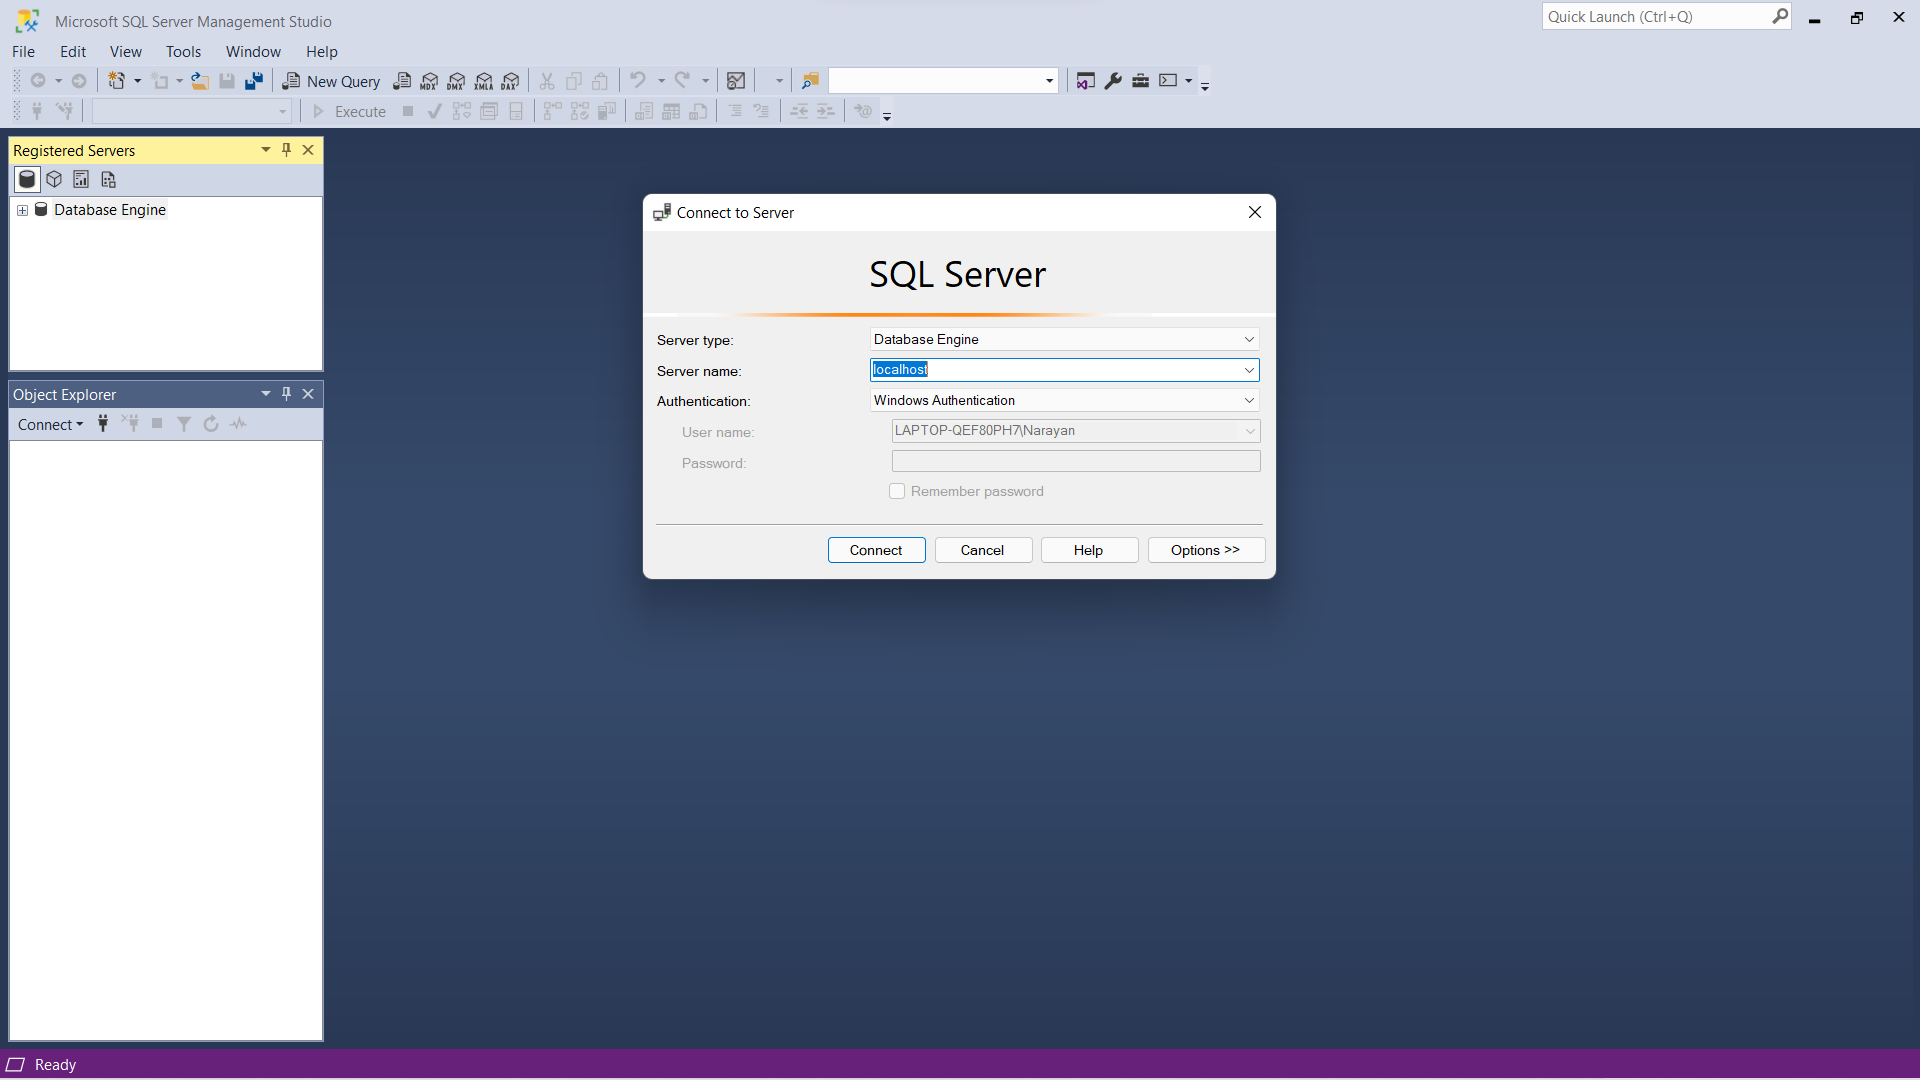
2. Right click on a Database and under Tasks, select "Import Data". Be sure not to click "Import Flat File" since this, for some reason excludes Excel files. This will open up the Import Wizard.
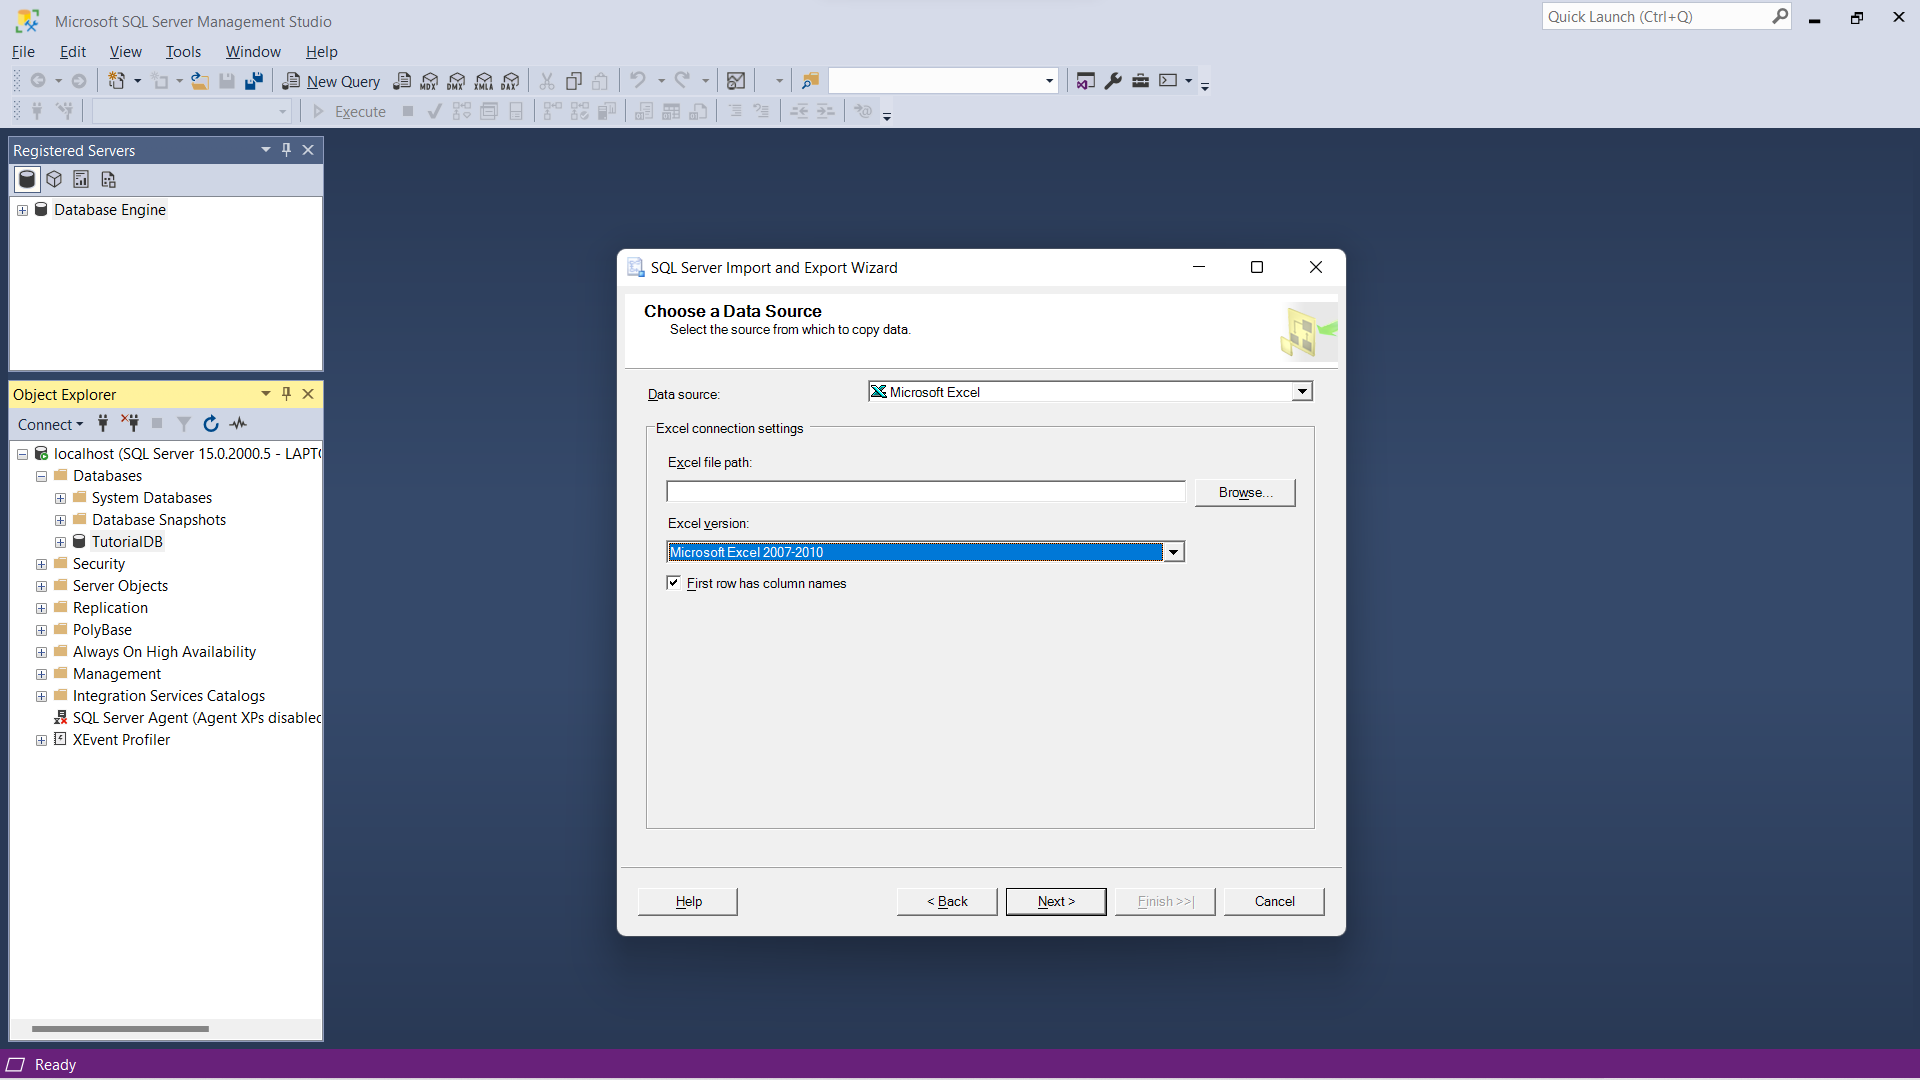
3. Click on "Next", and select "Microsoft Excel" from the dropdown menu of Data sources
4. Click on the "Next" button and if it works for you, congrats! It didn't work for me and I got this error message instead:
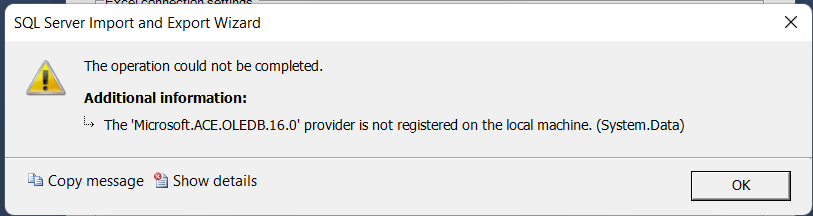
5. Which is a common error when you're switching between 32-bit and 64-bit versions of software. Not to worry! All you have to do is install an official Microsoft Access Database Engine, restart your machine, and you're done.
Your Excel file is now imported as a table in a database accessed through SSMS. The downside of this route is that it doesn't work if you use any other database management software. If you don't care about using a relational database management software in the first place, then you can just use Airtable. Consider using Dropbase or the SQLizer option if you do.
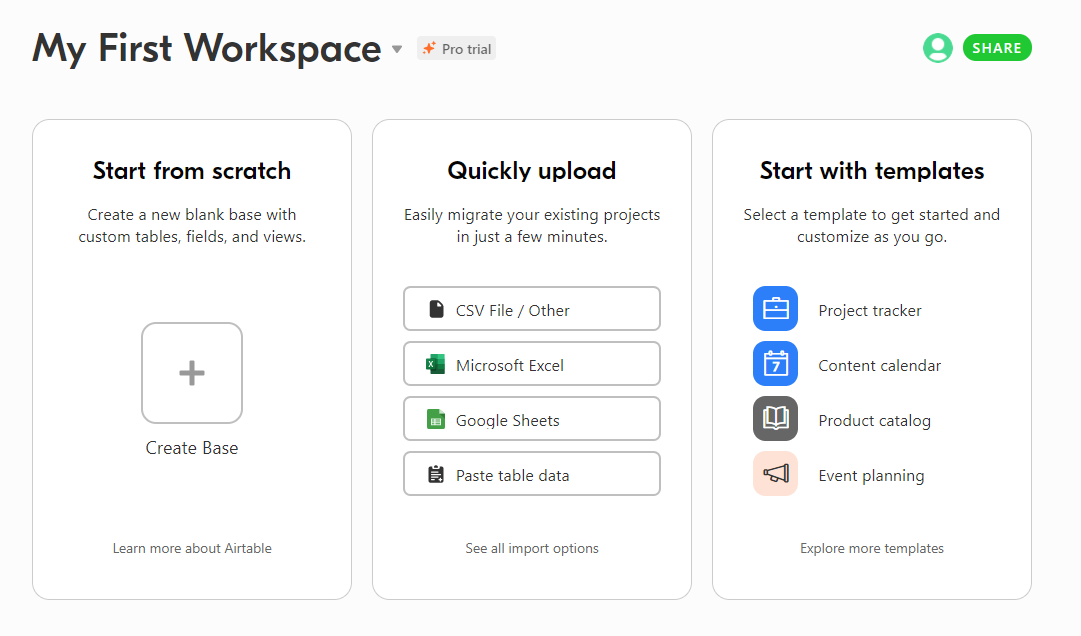
Although Airtable doesn't give you an actual database, you can still export an Excel file to it. You can then analyze and visualize the data in Airtable. Here's how:
1. You can either create a blank Base and then upload your file or select the Microsoft Excel option from Quickly upload. Let's say you choose to Start from scratch.
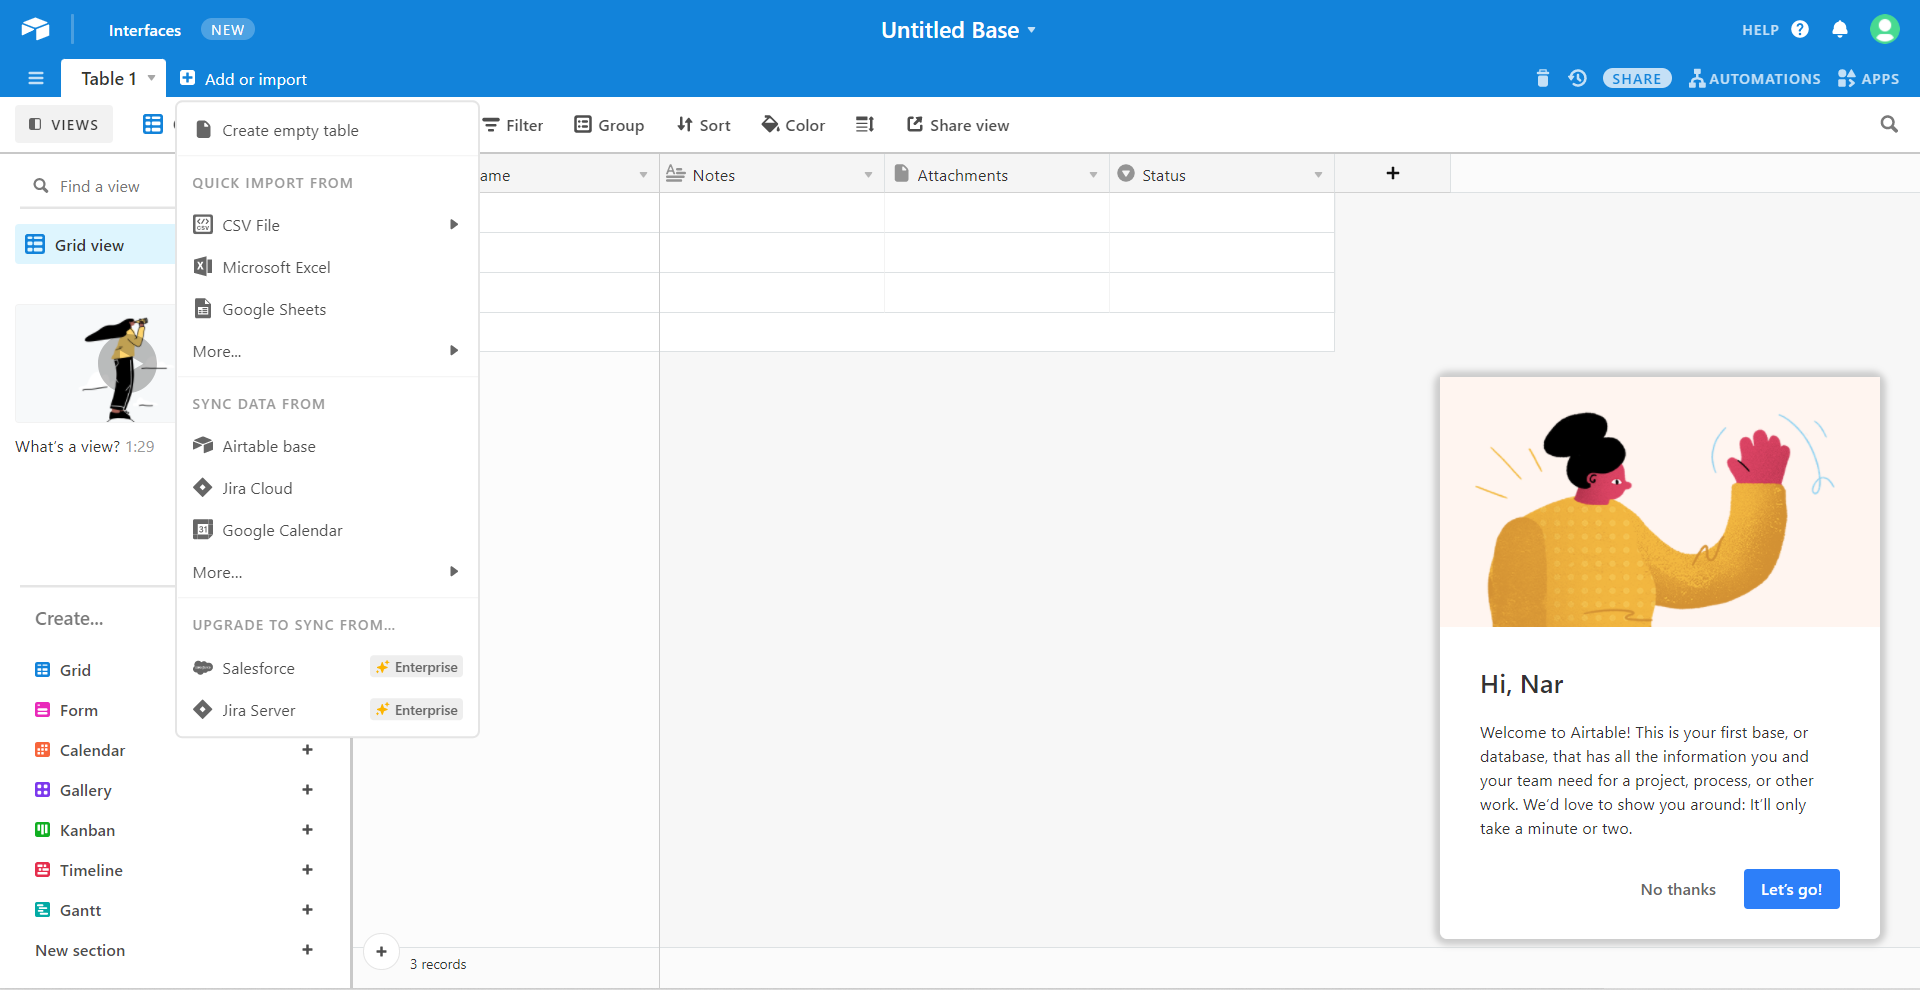
2. Click on the Add or import button and select Microsoft Excel
3. Drop your file in and verify that all the columns are imported correctly.
4. Your Excel data is now in Airtable and ready to be analyzed.
Using Airtable has more limitations than other options in this list. First, there's a 5MB limit on Excel files for all levels. Other options in this list, like Dropbase, has a 50MB limit for Excel files (for now!). Secondly, there's no way in Airtable to append Excel data to an existing table. You could create two different tables and then create a merged view on top of that, but you'll never have a single source of truth for your data.
So Airtable is not recommended if you want to work with Excel files regularly or if they're larger than 5MB.
These are 5 different ways to convert your Excel file to a database. I hope it was useful! If you'd like to check out how Dropbase works with Excel files, request a demo by contacting us and letting us know how you plan to use Dropbase.

Build production data pipelines from email attachments in minutes.
